Make your artwork print ready.
All files must be 300 DPI or vector format. Design should be sized to the size it should be printed. Text must be converted to outlines. Printing can only be as good as the artwork that is supplied. Flyers Unlimited will not be responsible for poor quality printing due to poor artwork. Flyers Unlimited is not responsible for any misspellings, errors, or issues in your art file. We do our best to catch these errors and point them out to you, but we do not catch them all. If it is in your art file and on your artwork approval form, that is how we will print it.!
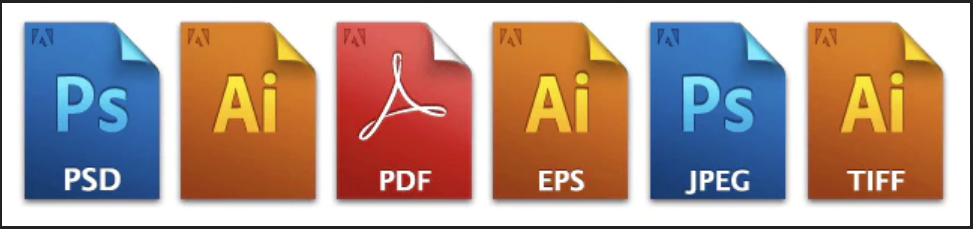
File Formats We Take
Ideally we would like vector files (AI, EPS, PDF) but we do accept bitmap (photo) files (PSD, JPEG, PNG,TIFF).
Vector Files
Illustrator EPS, PDF, etc.
Here are a few guidelines for the best results:
• Do not apply any trapping to the image.
• If appropriate, submit files with all colors converted to spot, and all unused colors deleted from the document.
• Unless there is a large body of text in the file, please convert all type to outlines. This will prevent confusion and save you the time of loading fonts onto the disk.
• Use PMS numbers for color names. Even though the generic “red” that the software gives you might look perfect on your monitor, all monitors display differently, so use a standard way to designate colors, like the Pantone Matching System. Refer to the uncoated colors for shirts and coated for all paper goods!) Be sure to check the PMS book for color accuracy as the on-screen versions are often misleading.
Note: These instructions relate to screen printing only. Digital print files are simply digital print files. Submit them to size and we’re all set.
Bitmap (Photo) Files
Photoshop, PNG, TIFF, etc.
Submit all full color, photographic files in RGB format. We can guarantee the best color fidelity if the file is in these “unadulterated” formats. If you are having an image scanned just for your t-shirt design, request RGB from your service bureau or scanner operator. Many high-end scanning units will scan images in CMYK. This is great for offset, but not so hot for screen printing. Some places will simply convert the file from the original CMYK format to RGB. This is acceptable but not the best way to do things. The key issue here is that when an image is in CMYK mode its palette of colors has been reduced for the offset printing process. If the image is to be spot color separated, we can often reproduce a wider range of colors than offset printing. Giving us the image in CMYK will limit the possibilities. Also, when a CMYK image is displayed on your monitor, the appearance of the image is controlled by a number of preferences you have set up for dot gain and printing inks. In RGB these factors will be ignored.
Photographic color and grayscale files should be to actual size, at least 150 ppi. The optimal dpi is 300.
IMPORTANT: For embroidery, we recommend 300 dpi minimum. Please make sure the file represents the actual size to be embroidered.
What if your files are detailed and your resolution is below 150? You’re likely to be disappointed with the result. There are a number of techniques we can employ to compensate for a lower resolution original, so please do not try to raise the resolution by plugging in higher numbers. It’s best to contact us early in the process for help resolving this issue. (Note: if there is type in your image, it should be set in a draw or layout program. Small, anti-aliased type looks too soft when printed on a t-shirt, even if it is 150 ppi at printing size.)
Prepare Your Files
All files must be at least 300 dpi or Vector Format. If your file is not 300 dpi, you cannot just increase the resolution of the file. This is called “upsampling” and will result in a blurry image.
Setting Image Size
If you are creating your file in Adobe Illustrator or another Vector-based software, size your artboerd and image to the size you want it to print. If you want your print to be 10″ wide, by 10" tall please be sure the actual design within the file is 10″ wide by 10" tall.
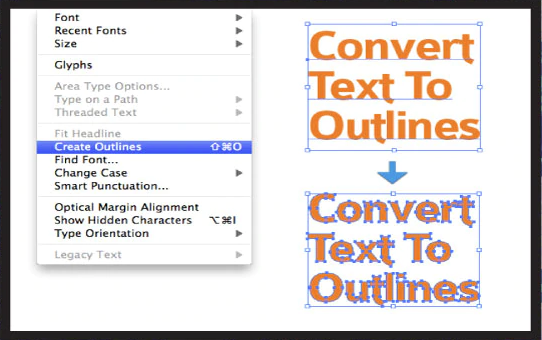
Convert Your Text To Outlines
All those cool fonts in your design, yeah I can't see them.
If you are creating your file in Adobe Illustrator, you will need to choose “Create Outlines” on all your text. This allows us to open the file without requiring the fonts.
Sending Artwork Files
Sending your artwork via email is easy and convenient. Flyers Unlimited can also accept USB flash drives and CDs/DVDs.
We recommend Dropbox.com for extremely large files.
If possible please compress all files to a .zip when sending through e-mail to protect the data. All files that travel over the internet are converted to text somewhere along the line. Zip compression protects your files from data corruption and makes them more easily accessible.
We can receive up to 8 megabytes of files per email. If your images are larger than 8 mb, please send your files in separate emails with your name in each of them.
Send us your files @ artwork@flyersunlimited.com
or send them via Dropbox.com
Please call or email us for our username & password.
|